The Structure of Dani's Race Codebase ( July 10th 2026 )
👁 14
https://blenderdumbass.org/articles/the_structure_of_dani_s_race_codebase___july_10th_2026__ : 👁 1
https://blenderdumbass.org/ : 👁 2
![[avatar]](/pictures/favicon.png) by Blender Dumbass
by Blender Dumbass
Aka: J.Y. Amihud. A Jewish by blood, multifaceted artist with experience in film-making, visual effects, programming, game development, music and more. A philosopher at heart. An activist for freedom and privacy. Anti-Paternalist. A user of Libre Software. Speaking at least 3 human languages. The writer and director of the 2023 film "Moria's Race" and the lead developer of it's game sequel "Dani's Race".
This is less of an article and more of an overview into how Dani's Race ( a game I'm developing ) works. Note, there is a date in the title of this article. Anything here is subject to change. But I don't think a lot of it will be that different in the end of the day. ↩ Reply
Game Engine
Dani's Race is made using the UPBGE game engine, specifically version 0.36.1 ( based on Blender 3.61 ). The game engine was chosen because it is a fork of Blender with game engine functionality added on top. As a blenderdumbass blender is very intuitive for me to use. And so I want a game engine that can utilize my blender intuitions. ↩ Reply
I chose not to update to newer UPBGE versions ( as of now they are already on version 0.5 ) because of 2 reasons: ↩ Reply
- Sometime between Blender 3 and Blender 4 the EEVEE rendering engine was re-written to be more useful for animation production. Technically speaking the engine is still blazing fast and useful for real-time stuff. But the newer engine is a bit slower. UPBGE 0.36.1 is the newest UPBGE that still has the old ( slightly faster ) implementation of EEVEE. ↩ Reply
- Sometime between 0.36.1 and 0.5 UPBGE devs started relying on AI-generated slop-code to add new features to the game-engine. In my opinion I should stay away from that sort of thing, specifically due to the reasons described inmy last article. ↩ Reply
The game-engine is pre-bundeled with the latest release of Dani's Race. But if you want to obtain a copy of the engine from the developers. You can use this link: ↩ Reply
https://github.com/UPBGE/upbge/releases/download/v0.36.1/upbge-0.36.1-linux-x86_64.tar.xz ↩ Reply
Launcher
![[embedded image]](/pictures/user_upload/blenderdumbass/dr_code_explained.png "Launcher")
The game's "main menu" ( so to speak ) is a little GTK program, I call "Launcher". ↩ Reply
File: run.py ↩ Reply
Some of it, mainly the "Score Board" and "Race Manager" ( but also one widget of the "Account" ) are implemented in a separate file: ↩ Reply
File: Scripts.Race_Manager.py ↩ Reply
The first peculiar thing in the code of the launcher would probably be these lines: ↩ Reply
import gi
gi.require_version('Gtk', '3.0')
from gi.repository import Gtk
As you can see I don't simply import GTK directly. I first import
gi and make it set the version of GTK to specifically 3.0. Any new system with any newer GTK ( if I don't that ) will try to run the code on the newest version of GTK. And they change a lot between versions. If I remember correctly even the concept of Window was basically removed in newer versions.
↩ Reply
win = Gtk.Window()
win.set_title("Dani's Race")
win.set_size_request(799, 280)
win.connect("destroy", Gtk.main_quit)
win.set_default_icon_from_file("SettingUI/icon.png")
box = Gtk.VBox()
win.add(box)
Then the launcher creates a Window object. Gives it a title, icon and some size. And then adds the banner image. ↩ Reply
As you can see both Icon and Banner are in
SettingUI folder.
↩ Reply
File: SettingUI/icon.png ↩ Reply
File: SettingUI/banner.jpg ↩ Reply
The folder also contains some of the earlier banners. ↩ Reply
I then set all the other buttons ( about which we will talk in a second ) and in the end of the program I run: ↩ Reply
win.show_all()
Gtk.main()
It makes sure that all of the widgets in the window are set to visible ( by default they are not ), and then I run the
Gtk.main() loop. This function inside of the GTK module doesn't stop running until Gtk.main_quit() is executed. But fortunately I already connected this function to the window's destroy event. Which means if you close the Launcher window, it will run Gtk.main_quit() stopping the GTK loop and exiting from the program.
↩ Reply
Now let's go over what each of the other things are doing. ↩ Reply
Single Player
playbutton = Gtk.Button("🎮 Single Player")
playbutton.connect("clicked", play)
playbox.pack_start(playbutton, 0,5,5)
You can find a button in the code for the "Single Player". And you can see it is connected to the function called simply
play(). So what does this play() do?
↩ Reply
def play(w, multiplayer=False):

    data = load_settings()
    data["multiplayer"] = multiplayer
    save_settings(data)

    if data:
        blenderplayer = data.get("blenderplayer", "Engine/blenderplayer")

        try:
            os.system("chmod +x "+blenderplayer)
        except:
            pass

        command = ['stdbuf', '-o0', blenderplayer]

        if data.get("fullscreen", True):
            command.append("-f")
        else:
            command.append("-w")


        command.append(data.get("resolution", "1920:1080").split(":")[0])
        command.append(data.get("resolution", "1920:1080").split(":")[1])

        # The file of the game
        command.append(os.getcwd()+"/assembly.blend")
        process = subprocess.Popen(command, stdout=subprocess.PIPE, universal_newlines=True)
Let's go over it: ↩ Reply
def play(w, multiplayer=False):

    data = load_settings()
    data["multiplayer"] = multiplayer
    save_settings(data)
As you can see
play() receives 2 arguments: w and multiplayer which is by default set to False.
↩ Reply
w is reserved for the GTK widget that calls this function. If I don't add anything to catch that, it will just error out. So I add the w variable. And then disregard it. ( It could be useful in other circumstances though ).
↩ Reply
multiplayer is used to set whether this game is played in multiplayer or not.
↩ Reply
As you can see, the game loads the settings file, applies this
multiplayer to the data in that file, and then saves the settings. When the game itself loads, it reads the settings file to apply all of the user-defined settings. But also it reads the multiplayer variable, to know whether to connect to a server or not. Or whether to execute certain multiplayer related functions in the game itself or not.
↩ Reply
blenderplayer = data.get("blenderplayer", "Engine/blenderplayer")
Then it reads one more thing from the settings file. The
blenderplayer location.
↩ Reply
UPBGE has two executables:
blender and blenderplayer. Blender looks like your standard blender. blenderplayer on the other hand has no UI what so ever. blenderplayer is used to directly run a UPBGE game. To run a UPBGE game you give blenderplayer a gamefile and that is all you need to do, technically.
↩ Reply
The launcher does a little bit more. ↩ Reply
        try:
            os.system("chmod +x "+blenderplayer)
        except:
            pass
First, as you can see, it specifically make the
blenderplayer file an executable. It is needed to do here, because we don't know who will install the game. And how much they know about anything. It should just run.
↩ Reply
        command = ['stdbuf', '-o0', blenderplayer]

        if data.get("fullscreen", True):
            command.append("-f")
        else:
            command.append("-w")


        command.append(data.get("resolution", "1920:1080").split(":")[0])
        command.append(data.get("resolution", "1920:1080").split(":")[1])

        # The file of the game
        command.append(os.getcwd()+"/assembly.blend")
        process = subprocess.Popen(command, stdout=subprocess.PIPE, universal_newlines=True)
Then it runs it using python's built-in
subprocess module. But as you can see it doesn't just run it.
↩ Reply
You can see it adds
stdbuf -o0 to the beginning of the command. This is important for later.
↩ Reply
Then it adds an option
<ul><li>f or -w to the command. You can pass various arguments to the blenderplayer executable to change how the game is launched. -f launches the game in full-screen mode. -w launches the game in windowed mode.
↩ Reply
As you can see then it adds a resolution argument to it as well. And finally it runs it with
subprocess.Popen.
↩ Reply
Now what was this
stdbuf all about? Well... the launcher doesn't just runs the game-engine. It also spawns a second thread to listen to the game-engine's output ( the stdout stuff ). stdbuf -o0 stuff helps the stdout be a little bit more real-time. Without it the output would be slow and would be received in large chunks.
↩ Reply
This output is used to render this window: ↩ Reply
![[embedded image]](/pictures/user_upload/blenderdumbass/dr_code_explained1.png "progress bar")
The output of the game engine ( until the message
GAME STARTS ) is dumped into a file:
↩ Reply
File: grabbed.txt ↩ Reply
When the actual game is properly loaded, one of the first things it does is printing the words
GAME STARTS to stop writing stdout into grabbed.txt. All of the stuff before that, are various warning that UPBGE talks about. And various messages like:
↩ Reply
Info: Read library: '/home/vcs/Projects/Games/DanisRace/ast/veh/NeonSpeedster.blend', '//ast/veh/NeonSpeedster.blend', parent '<direct>'
As you can see in this example, the engine tells us that it read from a file called
NeonSpeedster.blend at some point.
↩ Reply
By comparing
grabbed.txt of the previous launch and stdout of this launch, we can estimate, how far we are into actually starting the game itself. And using this estimation we can render a little progress bar.
↩ Reply
And also by actually parsing what the game engine is telling us about, we can guess some useful information about the current operation the game engine is doing. Is it loading assets? Is it compiling shaders? And so on and so forth. ↩ Reply
Settings
Let's talk a bit more about the settings of the game. ↩ Reply
The settings file of Dani's Race ( unless you mess with the code ) is stored in: ↩ Reply
~/.local/share/danisrace/config.json
↩ Reply
It is a simple JSON formatted dump of data ( done using python's
json module ).
↩ Reply
To find the config file, the game uses 2 functions. It runs the
load_settings() function which looks like this:
↩ Reply
def load_settings():

    folder = get_settings_folder()
    f      = folder+"/config.json"

    try:
        with open(f) as o:
            return json.load(o)
    except:
        try:
            with open("default_config.json") as o:
                return json.load(o)
        except:
            return {}
But as you can see it gets the config folder from a separate function called
get_settings_folder() which looks like this:
↩ Reply
def get_settings_folder():

    game = "danisrace"

    try:
        data_dir = os.environ["XDG_DATA_HOME"] + "/" + game
    except:
        data_dir = os.path.expanduser("~/.local/share/"+game)

    try:
        os.makedirs(data_dir)
    except:
        pass

    return data_dir
When working on FastLBRY somebody told me that they have set their home directory on a different disk. And to do so they set the
XDG_DATA_HOME environment variable.
↩ Reply
Here we are trying to respect this custom home directory if there is one. But it fails to read this variable, we default to the
~/.local/share/danisrace. Obviously I'm passing it through os.path.expanduser because python directly doesn't understand that on my machine ~ is actually /home/vcs.
↩ Reply
Then we try to make this folder, because if it doesn't exist, it is bad. And then we return it, to whatever or whoever wanted this folder. ↩ Reply
And then the
load_settings() can use said folder to try to load config.json out of it using standard json stuff.
↩ Reply
![[embedded image]](/pictures/user_upload/blenderdumbass/dr_code_explained2.png "Settings dialog")
The settings dialogue itself is just a fancy editor for the
config.json file. It is implemented in the standard GTK with standard GTK widgets. As of lately I started separating various settings into subgroups using a Gtk.Notebook().
↩ Reply
It is rather unremarkable, because frankly it is a piece of spaghetti code, but it does have a few interesting functions. ↩ Reply
Folder
configs contains 5 different graphical presets that can be auto-applied using the first menu-bar in the UI. Technically speaking, adding more files into configs will give you more options to choose from. In case you want custom presets.
↩ Reply
You may want to edit a line: ↩ Reply
"config_name":"<your config name>",
Multiplayer
![[embedded image]](/pictures/user_upload/blenderdumbass/dr_code_explained3.png "Multiplayer window")
The multiplayer window runs in 2 threads. One is the GTK thread for the UI. And the other one is the networking thread that tries to talk to the multiplayer server. ↩ Reply
The multiplayer server itself is a separate repository hosted here: ↩ Reply
https://forg.madiator.cloud/BlenderDumbass/DanisRace_Multiplayer ↩ Reply
To talk to the server, the launcher uses the
client.py module:
↩ Reply
File: Scripts.Multiplayer.client.py ↩ Reply
The server itself is not using HTTP or anything like this. It uses direct TCP socket connections. This way the game receives updates much faster than with HTTP. The protocol for the server / client communication is explained in the Multiplayer Server's Readme File, but in short it uses compressed JSON blobs to communicate back and forth.
{"games":null} for example, will be a request to get the list of active games. The JSON is then encoded into utf-8 and compressed using zlib module, before sending.
↩ Reply
def encode(data, send_raw=False):

    # This will encode data for sending.
    # Data should be a writable into JSON.

    if not send_raw:
        J = json.dumps(data).encode("utf-8")
    else:
        J = data.encode("utf-8")
    C = zlib.compress(J)

    zed = len(C)
    raw = len(J)

    # Sometime compressed is larger than raw.
    # We will add a byte saying 69 if it comressed
    # and a byte saying 0 if it not sexy like this.

    if not send_raw and zed < raw:
        return chr(69).encode("utf-8")  +  C
    else:
        return chr(0).encode("utf-8")   +  J
Sometimes raw bytes of the JSON are actually smaller than the compressed version. It could happen with very short messages. As you can see the
encode() function checks for which version is smaller. And puts the binary of either 0 or 69 ( nice ) in from of the message, to tell the other side which version this is.
↩ Reply
When you push the "Join" button besides any of the listed games, it runs the old good
play() function that I already explained earlier. But this time tells it to set multiplayer to True. Meanwhile the UI of the multiplayer itself is just a fancy editor for the same old config.json. This time adding parameters like which server and which game you are trying to play.
↩ Reply
Updates
When I push an update I run
notgit.py commit on my computer.
↩ Reply
File: notgit.py ↩ Reply
This runs the
Commit() function inside of notgit.py.
↩ Reply
The function itself lists all of the files in the game's folder ( recursively ) and then compares the new list with the previous recorded list. If anything about anything is changed it makes a list of changes and stores them in
.notgit/commits folder.
↩ Reply
When you launch your launcher, it spawns a new thread, which tries to download the list of updates: ↩ Reply
https://blenderdumbass.org/danisrace/json/fullreport ↩ Reply
Since blenderdumbass.org is hosted on the same machine, as where I make changes to the game, I can refer directly to the game folder on my computer, to give you a full list of updates. And then serve you the files directly from the source. ↩ Reply
When I do a commit the files are not uploaded somewhere. They stay where they are. When you download the files, you are downloading them straight from the
DanisRace folder, on which I'm developing. Straight from the computer, on which I am doing the development. Also any link to any of the files in Dani's Race in this article is also linked directly to the file on my computer. I'm using the same system for this article.
↩ Reply
If the launcher successfully receives the update data and finds that you need to update your game, it will prompt you with button "Check Updates" where you can read the entire change-log, before downloading the files. ↩ Reply
Now, the way it checks for which files need an update is very simple. It uses an
md5 hash. Those are rather small. Here is the hash for the current run.py:
↩ Reply
f61361b296062cc672427dc40f692588
If even 1 bite of the file is altered, the hash would be completely different. Which means I can send you a list of files with the list of those
md5 hashes. And you can check your list of files and your list of hashes against my hashes. And if any of the hashes don't match, the file must be changed. And only then you need to download the entire thing.
↩ Reply
The logic on blenderdumbass.org that handles this communication is available here: ↩ Reply
https://blenderdumbass.org/plugins/danisrace_api.py ↩ Reply
Score Board
![[embedded image]](/pictures/user_upload/blenderdumbass/dr_code_explained4.png "Score board")
Dani's Race has an online score-board into which you can opt-in from the "Account" window. ↩ Reply
The score-board itself is calculated by the
danisrace_api.py plugin on blenderdumbss.org server.
↩ Reply
Similarly to how Updates work, in a separate thread it pulls the data from the website: ↩ Reply
https://blenderdumbass.org/danisrace/json/scoreboard ↩ Reply
As you can see it is a yet another JSON. And then it renders said JSON with GTK. ↩ Reply
A similar thing happens with Race records too. Except here you have settings for which records to pull from the server. ↩ Reply
The Game Itself
Now let's go over the fun part. The game itself. ↩ Reply
![[embedded image]](/pictures/user_upload/blenderdumbass/dr_code_explained5.png "Assembly blend")
File Structure
The game itself is technically just
assembly.blend file. Everything in this file is the game. But because blender can do that, and because it is convenient, some of the stuff visible in assembly.blend is actually linked from a different file.
↩ Reply
The
ast folder for example, contains various 3D models. All different .blend too, which are linked into assembly.blend.
↩ Reply
There is a
loc folder in the ast which contains a version of the city of the game. At one point the city itself was linked as well. But a decision was made to make the city a direct part of assembly.blend. It is way more convenient to work on it like that.
↩ Reply
For optimization reason the game has
ast/Shared_Materials.blend. This files contains materials that are often used between other ast files. Like Glass and Rubber, used in pretty much every car in the game. Because all those materials are linked from the same source, the game engine knows it is the same material and doesn't waste draw cycles rendering them all separately.
↩ Reply
Logic Structure
![[embedded image]](/pictures/user_upload/blenderdumbass/dr_code_explained6.png "Main Update")
UPBGE uses Logic Bricks. Those are tiny UI thingies you connect together to make the logic of your game. The camera in the game, for example, has an "Always" sensor on it, attached to a Python module. As you can see it is attached to: ↩ Reply
File: Scripts.Main_update.py ↩ Reply
Specifically to the
main() function in that file.
↩ Reply
Basically it will run the
Scripts.Main_update.main() on every frame of the game ( or "Always" ). But as you can see sensors for mouse movement and mouse-wheels are also connected to the same script.
↩ Reply
UPBGE gives you ways to see which thing is activating the script, and based on that change states. And the game needed some way to get mouse-controls. So here is one way to do it. ↩ Reply
Now Characters and Vehicles in the game run their own per-frame update scripts. Specifically: ↩ Reply
File: Scripts.Vehicle.py ↩ Reply
File: Scripts.Character.py ↩ Reply
For vehicles in
Scripts.Vehicle.py there is the UpdateCar() function. For NPC characters, there is the Scripts.Character.Update() function. And specifically for Dani ( the main character ) there is Scripts.Character.DaniUpdate() function.
↩ Reply
Vehicles
        if car.get("active"):
            UserControl(car)
UPBGE game objects are represented with bge.types.KX_GameObject type. It is a part of the
bge module that let's your python scripts read and alter game states.
↩ Reply
This
KX_GameObject has a built-in python dictionary. So you could assign variables to said object directly. Say I have a car representing a vehicle in the game-world. I can assign to it things like car"active"So if the car is "active", if
car.get("active") returns True, we run the UserControl() function, which in turn, let's the user control said car.
↩ Reply
![[embedded image]](/pictures/user_upload/blenderdumbass/dr_code_explained7.png "neonspeedster")
Each car is actually multiple objects stringed together into one big asset. We have the
Box object which runs the UpdateCar() function. In the Neonspeedster, for example the Box object is called NeonSpeedsterBox.
↩ Reply
This
Box object is an actual rigid-body physics object in the game. But as you can see in the screenshot, it is rather simple in shape. Those Box objects all use Convex Hull bounds. This means that the car is not a square or a ball, but roughly shaped as a car. So when you flip it over, it will flip more or less properly.
↩ Reply
To the
Box various render-able objects are attached. Mainly the Car_body of the car. This Car_body is called exactly the same in each car asset. It is possible because those assets are linked in whole into the assembly.blend. The problem is you cannot simply find said Car_body by just looking at the list of objects in the scene. What you need to do instead looks something like this:
↩ Reply
body = car.childrenRecursive["Car_body"]
This
Car_body object is parented to the Box object, meaning it is in the children of the Box object. And if you only iterate over the children, you can find the proper Car_body.
↩ Reply
As you can see in the screenshot, there is also the broken version of the same
Car_body object to the side of the Box object. This broken version has a small logic brick setup basically making it invisible as soon as the car spawns into the game.
↩ Reply
When the car hits a certain
health level, the code runs the ChangeBody() function, which replaces the mesh-data of the current Car_body with the data in the broken version. The broken version is there just to hold the data. It never actually gets revealed.
↩ Reply
Now as you can also see, there are separate objects for doors and hoods and other wheels and other parts. Those are needed to be separate because it allows for more fragmented damage model. You can only replace the mesh-data of say one of the doors, instead of the whole car, making more variable and therefor more interesting looking damage. ↩ Reply
The doors all have unique names like
Neonspeedster-Door_Pease.001. This is because new parts of this exact model need to be spawn-able at will, when the car "detaches" parts. On every detach, the part just becomes invisible, while a new part of the same exact model is spawned in its location. If I would call them more generic names like Door_R or something, I run a risk of a door from one car spawning in for another car which would look silly.
↩ Reply
![[embedded image]](/pictures/user_upload/blenderdumbass/dr_code_explained8.png "Car door settings")
Every "door" has default variables assigned to them.
minrot, maxrot, Good, Borked and so on and so forth. Vehicle.py has a function called SwingDoors() that uses those values to simulate physics on those doors.
↩ Reply
If you hit a door in the game it doesn't just change the mesh-data to a broken version. It also starts to wobble around. The
minrot and maxrot variables control the range of rotation. You can add things like axis to the variable list, if you want it to wobble not on the X axis, like for hoods and trunk-doors.
↩ Reply
Cars also have objects that are only proxies for other things. Every car has a
Dani_Stand_Target which is used for the animation of entering the car. This is the position next to the car that marks the driver's door. You also have Dani_Sit_Target, which is the point in the car, where the model of Dani would be parented to, when he is sitting in the car.
↩ Reply
For cars that allow passengers you will also have
Other_Sit_Target and Other_Stand_Target.
↩ Reply
And then you have objects like
SpoilerProxy and NitroCanProxy that are used by the PowerWrench look logic, to attach Spoilers and Nitro into the car. Those mark the target position, rotation and scale of those attach-able objects.
↩ Reply
Then you have the files in the
cardata folder, like the:
↩ Reply
File: cardata/NeonSpeedsterBox.json ↩ Reply
Which looks like this: ↩ Reply
{
    "name":"Neonspeedster",
    "probability":1,
    "type":"race-car",

        "material":{"MainColor"     :[0.051525, 0.514757, 1.000000],
                    "SecondaryColor":[0.051525, 0.514757, 1.000000]},
    "icon":[2,0],
    "cost":2990000,

        "wheels":[
            { "radius":0.42, "xyz":[ 0.89, -1.25, 0.150], "down":[0,0,-1], "axel":[-1,0,0], "suspensionRest": 0.2, "front":true , "object":""    , "drift_grip":0.2},
            { "radius":0.42, "xyz":[-0.89, -1.25, 0.150], "down":[0,0,-1], "axel":[-1,0,0], "suspensionRest": 0.2, "front":true , "object":".001", "drift_grip":0.2},
            { "radius":0.42, "xyz":[-0.89,  1.65, 0.150], "down":[0,0,-1], "axel":[-1,0,0], "suspensionRest": 0.2, "front":false, "object":".003", "drift_grip":0.1},
            { "radius":0.42, "xyz":[ 0.89,  1.65, 0.150], "down":[0,0,-1], "axel":[-1,0,0], "suspensionRest": 0.2, "front":false, "object":".002", "drift_grip":0.1}
        ],

        "mass"                : 1800    ,
        "hp"                  : 600     ,
        "torque"              : 120     ,
        "drag"                : 0.25    ,
        "roll"                : -0.4    ,
        "grip"                : 0.3     ,
        "maxturn"             : 0.8     ,
        "brakes"              : 2.0     ,
        "abs"                 : 0.01    ,
        "downforce"           : 2.0     ,
        "suspention"          : 200.0  ,
        "suspentionDamping"   : 0.6     ,
        "maxrpm"              : 8000    ,
        "idle"                : 1100    ,
        "redline"             : 6000    ,

        "gears":[
            5.00,
            3.00,
            2.00,
            1.00,
            0.75,
            0.50,
            0.25,
            0.20,
            0.15
        ]
    }
This represents other data about the car. It's name, the probability of it spawning in, the cost, the icon of the car, the horse-power, the suspension, the weight, the placement of the wheels. And so on and so forth. ↩ Reply
Car Physics
Let's talk a little about how the car behaves like a car. And specifically the code that makes it all possible. ↩ Reply
So every var is just a rigid-body object running the
UpdateCar() function. Let's digest that:
↩ Reply
def UpdateCar(car):

    # This function runs on every frame for each car,
    # making the car interactable in the game.

    # Clear the car and get the scene
    scene, car = GetSceneAndCar(car)
    dani = scene.objects["Dani_Box"]
When you run a script from the logic bricks, the object you receive in the function's arguments ( represented with
car) is not the KX_GameObject of the car itself, but rather a bge.types.SCA_PythonController object representing the logic-brick that calls the function. Now sometimes I just want to run UpdateCar() on an actual KX_GameObject. But most of the time I will get the SCA_PythonController. This is where the GetSceneAndCar(car) function helps us.
↩ Reply
def GetSceneAndCar(car):

    # This module parses the inputs of other modules.
    # And gives back bge.scene and the car object.

    # We don't know if what we get here is the controller
    # where the script is running, or the object itself.

    if type(car) == bge.types.SCA_PythonController:
        car = car.owner

    scene = bge.logic.getCurrentScene()

    return scene, car
It basically runs a simple check of what kind of thing was received. And if it is the wrong thing, it finds the right thing, and gives you back the right thing. And along the way gives you the whole game-scene. Because why not. ↩ Reply
carD = Opt.FastDict(car)
Then this happens. In my optimization video I talk about why what I'm doing here is important. Basically because
KX_GameObject is not actually a real python dict but only pretends like one for convenience, it is a bit slower to assign values directly to the game object. Opt.FastDict() is giving me a real python dict specifically associated with the car. Into which I can put values that are constantly changing.
↩ Reply
We gonna go over some of the stuff in the
Opt module a bit later, when talking about Optimization.
↩ Reply
Then eventually the car runs the
PhysicsUpdate() function. Which does this check:
↩ Reply
    initfirst = False
    if not getCarPhysics(car):
        InitCarPhysics(car)
        initfirst = True
getCarPhysics() is a very simple function that basically tries to give you the physics constraint of the car. But if fails to do so ( like when the car is new and just spawned in ) it give you False, prompting the InitCarPhysics() to run.
↩ Reply
Now
InitCarPhysics() is actually quite interesting.
↩ Reply
def InitCarPhysics(car):

    # This part of code runs once per car. It generates the
    # Bullet Physics Vehicle Constraint setup.

    # Clear the car and get the scene
    scene, car = GetSceneAndCar(car)
    carD       = Opt.FastDict(car)

    # Get the data about this car
    car["specs"] = GetCarSpecs(car.get("carData", car)).copy()

    # Create a constraint
    carPhysics = bge.constraints.createVehicle(car.getPhysicsId())
    car["cid"] = carPhysics.getConstraintId()
    car["VehicleConstraintId"] = carPhysics.getConstraintId()


    # Adding wheels
    for n, wheel in enumerate(car["specs"]["wheels"]):
        AddWheelToCar(car, wheel)
        car["wheels"][n].position = carPhysics.getWheelPosition(n)


    # Connect doors and other hinged objects
    car["doors"] = []


    for obj in car.childrenRecursive:
        if obj.get("door"):
            car["doors"].append(obj)
            obj.suspendPhysics()


    # Init Various things we might need

    # Engine things
    carD["rpm"]    = float(0.0)
    carD["turn"]    = float(0.0)
    carD["prevF"]  = float(0.0)
    carD["prevT"]  = float(0.0)
    carD["health"] = float(1.0)
    carD["nitro"]  = float(0.0)

    carD["shake"]  = float(0.0)


    # Set the mass of the car. We divide the mass
    # by 10, since there is a limit of how strong
    # can be car's suspension. UPBGE does not provide
    # a way ( yet ) to override this limit.
    car.mass = car["specs"]["mass"] / 10

    # Create a callback for collisions
    def OnCollisionDo(obj, point, normal, points):

        # For readability reason, I put the code
        # for the task itself in a separate funtion
        # below.

        if car["active"] or (InView(car) and Opt.GoodFPS("Collision"),0.6):
            work_anyway = False
            if obj == "Explosion":
                work_anyway = True
                obj = {}
            OnCollision(car, obj, point, normal, points, work_anyway)

        # I would love to be able to do a Scheduling instead of simple
        # FPS checking for non player cars. But this results in Seg-Faults
        # because apperately the script tries to read "points" that are
        # freed after the simulation step of the collision is over.

    car.collisionCallbacks.append(OnCollisionDo)

    # For trucks
    UnloadCargo(car)


    car.angularVelocityMax = car["specs"].get("maxAngularVelocity", 1.5)


    print(consoleForm(car),clr["bold"]+clr["tdrd"],"Physics Initilized.", clr["norm"])
As you can see it runs the
bge.constraints.createVehicle() function that is built into UPBGE. UPBGE internally runs Bulled Physics as the physics engine, which contains a Vehicle Constraint functionality. And so I can use that Vehicle Constrain functionality to make my vehicles.
↩ Reply
That is when the car reads from the JSON data-sheet about where the wheel should go, and adds them to the vehicle constraint. Those JSON files are put into
car"specs"Also here I run the
car.collisionCallbacks.append(OnCollisionDo) function.
↩ Reply
In UPBGE you can assign various functions to various objects when various things happen. In this case I'm adding a function that will be executed every time this car collides with something. You can trace it to
OnCollision() function that does quite a lot of work. For instance, it is the function that handles the car deformations. It is also the function that starts a pursuit mode, when you hit NPC cars on the street.
↩ Reply
From then on, after the Init is done and the car now has suspension and wheels, we can apply various forces to it, calculated by the
PhysicsUpdate(), which internally calls other things, like ApplyEngine() and other stuff.
↩ Reply
As you can see
Vehicle.py is full of little function that do various small things. Look at this one for example:
↩ Reply
def HorsePowerToWatts(value):
    return value * 745.6998715823
Isn't it neat? ↩ Reply
The car ( or more like
carD ) has a variable npc which you can set to make it do various things.
↩ Reply
        if car.get("active"):
            UserControl(car)

        elif carD.get("npc") == "npc":
            NormalNPC(car)

        elif carD.get("npc") == "pursuit":
            AngryPursuit(car)

        elif carD.get("npc") == "autopilot":
            TargetedNPC(car)

        elif carD.get("npc") == "goingToRace":
            TargetedNPC(car)
            Map.Show(car, color=GetColor(car))

        elif carD.get("npc") == "taxiComing":
            TargetedNPC(car)
            Map.Show(car, color=GetColor(car))

        elif carD.get("npc") == "story":
            pass # If it is controlled from story

        elif carD.get("npc") == "race_ghost":
            RacingGhost(car)

        elif car.get("racing"):
            RacingAI(car)
All those functions have their own internal logic with some overlapping concepts.
NormalNPC(), TargetedNPC(), RacingAI() and AngryPursuit() for example use targeting, which is implemented similarly. Just they go to different targets and using slightly different logic to achieve their goals more optimally. For example NormalNPC() will go to random points on the map, to simulate a car with a destination, while TargetedNPC() will have a predefined destination and will use path-finding to get to the destination. On the other hand RacingAI() and AngryPursuit() will disregard safety and try to get to their respective targets as fast as possible.
↩ Reply
Another interesting 2 functions to look at are
Encode() and Decode(). Those save and restore a state of a car. Say the player puts a car into his garage, at home and then closes the game. You want this car to be saved for when the player opens the game next time. The Encode() function dumps all the relevant data about the car into a JSON-like structure ( which is easy to dump into JSON ). Decode() takes this JSON-like structure and actually makes a real game object of a car. This is also useful ( and used ) in the multiplayer. That is why, you can see, that Decode() function is very selective about how to decode the car. You don't want to send to the server all of the data all the time. And therefor something you may need to decode only some of the data.
↩ Reply
Characters
![[embedded image]](/pictures/user_upload/blenderdumbass/dr_code_explained9.png "character")
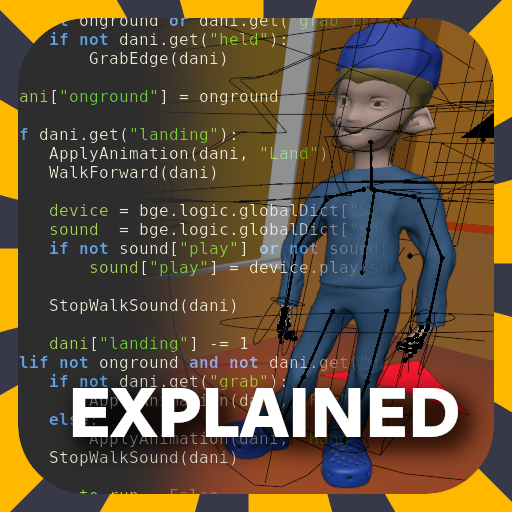
Similarly to Vehicles, characters also have a
Box object which is the physics objects that is interacting with the world. They also have the Body that represents the character visually. And that also can change shapes ( outfits ). It is very similar to how the car has deformed and un-deformed options. But this time with more than 2 options.
↩ Reply
The outfits logic is mostly handled by: ↩ Reply
File: Scripts.Outfits.py ↩ Reply
But characters also have a rig, which is what enables them to be animate-able. ↩ Reply
![[embedded image]](/pictures/user_upload/blenderdumbass/dr_code_explained10.png "actions")
This rig has usually more than one action. This is useful for things that should be played in the same time. Like for example, sometimes during missions Dani gets a phone-call. So his hand moves his phone closer to his head, to speak. But this should not impede on the ability to do other things, like walk and run and jump and so on and so forth. So for this the 2 animations should be played in the same time. One only animating the hand, while the other animating the rest of the body. ↩ Reply
The entire list of all animation for Dani could be found at: ↩ Reply
File: animdata/chr/Dani_Box.json ↩ Reply
When I add animations to Dani's character I write those animations down into this JSON file manually. And then the
ApplyAnimation() from Character.py handles everything for me.
↩ Reply
I can do this hypothetical piece of code: ↩ Reply
ApplyAnimation(dani, "Walk")
ApplyAnimation(dani, "AnswerPhone")
And Dani will be both walking and Answering the phone in the same time, because this is how
AnswerPhone is set in the json:
↩ Reply
"AnswerPhone":{
        "Action":"DanisPhone",
        "Frames":[32, 100],
        "kwargs":{"layer":2},
        "Keep":true
    },
The
"kwargs":{"layer":2}, is that does the magic here. We are overlaying DaniWalking action with DanisPhone action, putting the phone action in layer 2. Meaning they can play together.
↩ Reply
NPCs
For NPCs I have a very convoluted system of
personality. Look at Update() function to see what I mean.
↩ Reply
But in broad strokes a
personality is a way for me to program the NPC's train of logic. Here is an example:
↩ Reply
            driver  = car.get("targetDriver")
            officer = car.get("driver")
            police  = [139, -252.3, 40.6]
            prison  = [81.58, -242.6, 50.41]
            action = ["wait", 30,
                      ["grab", driver,
                       ["say", "police_miranda",
                        ["say", "police_incar",
                         ["drive", car, police,
                          ["grab", driver,
                           ["walk", "Police_Path", "important",
                            ["put", prison,
                             ["walk", "Police_Path", "important"]
                             ]
                            ]
                           ]
                          ]
                         ]
                        ]
                       ]
                      ]
This is a part of
Scripts.Vehicle.AngryPursuit() function. When the police finds out that they can try to arrest Dani on foot, they execute this set of instructions.
↩ Reply
Every instruction is a list, where the first item is the name of the task:
grab, say, drive, etc... And the last thing on the list, is the next task to do, which is a list in-itself. In between are the arguments of the task. The
Update() function in Character.py actually goes over all this nonesense and actually executes it.
↩ Reply
Optimization
Most of the optimization in the game is handled by the
Opt module:
↩ Reply
File: Scripts.Opt.py ↩ Reply
It does a few very important things: ↩ Reply
GoodFPS()is used to schedule execution of heavy operations. It does some analysis of the operations at hand. Let's them run a little towards the beginning of the game. And records how badly they impact the performance. Then it uses this data to prevent very bad function from running often, trying to massage functions into the available time, to try to hit the target FPS. ↩ Reply
Address(),UpdateScene()andPrecalculate()are used to do dynamic spawning and despawning of decorative dynamic or heavy objects, like breakable wood-fences.Address()is used to not try and measure distances to every single point where a wood-fence could be. But rather separate everything into chunks ( usingPrecalculate()) and only check distances to objects within the same Address as the camera. ↩ Reply
FastDict()gives each game-object in the game an assignabledictthat works a bit faster than the built-in UPBGE one. ↩ Reply
Another big part of the optimization pipeline is the
Reuse module:
↩ Reply
File: Scripts.Reuse.py ↩ Reply
UPBGE ( being based on Blender ) has a problem of dependencies. Because everything can drive everything, there is always a complex dependency graph present at all time. Remember Vehicle has doors that are parented to the
Box which has a Vehicle constraint. Where those doors end up is calculated though this dependency graph system.
↩ Reply
The problem is, spawning and despawning objects, creates a need to completely recalculate the dependency graph. Giving you noticeable performance drops. ↩ Reply
Instead you can "Reuse" objects. Instead of deleting the old ones and replacing them with the new ones, you can just move the existing ones somewhere else. ↩ Reply
Reuse module abstracts this idea of moving objects around into two functions Reuse.Create() and Reuse.Delete() which I use constantly, everywhere in the code.
↩ Reply
I call
Reuse.Delete() and instead of deleting it, the object just moves far away from the map and becomes invisible. I run Reuse.Create() and I get that far-away object. Obviously if I don't have what I need it will actually need to spawn new objects. And sometimes, you will need to actually delete some objects. But for the most part it just moves them arround.
↩ Reply
Other stuff
![[embedded image]](/pictures/user_upload/blenderdumbass/dr_code_explained11.png "navigation mesh")
For navigation, specifically for path-finding across the city, Dani's race uses a mesh, which is hand-modeled, that maps the driveable roads in the game. ↩ Reply
This mesh is then converted into a
dict on the first frame of the game with Scripts.Navigation.PrecalculateNavigationMesh()
↩ Reply
File: Scripts.Navigation.py ↩ Reply
To do this I use the
bpy module which allows me to dig through every single vertex and edge on this navigation mesh. And then record all of their positions somewhere.
↩ Reply
For the actual path-finding I'm running
Scripts.Navigation.GetPath() which is my own personal implementation of A* algorithm.
↩ Reply
![[embedded image]](/pictures/user_upload/blenderdumbass/dr_code_explained12.png "minimap")
For the mini-map in the corner of the screen I use a shader where an image of the map is mapped ( pun intended ) using custom attribute values that come from object's custom properties. These properties I can set during gameplay, using code. ↩ Reply
This is also how I change car colors and change icons. ↩ Reply
Conclusion
I don't think I explained everything about everything. But I hope this is enough information, so you now could dig through the code and comprehend it, more or less. ↩ Reply
Frankly, I don't know why I did it. Like I'm not even using git. I don't have a channel for code contributions. I suppose I need to think about making some. ↩ Reply
Happy Hacking!!! ↩ Reply
Find this post on Mastodon
![[avatar]](/pictures/user_upload/Troler/55NKGQKE7IRKMLHV.png)
![[thumbnail]](/pictures/user_upload/Troler/NGWJ6K0NF96N3RYQ.png)
![[thumbnail]](/pictures/thumbs/notgit.png)
![[thumbnail]](/pictures/thumbs/nanwhy.png)
![[thumbnail]](/pictures/thumbs/whycareDR.png)
![[thumbnail]](https://peer.madiator.cloud/lazy-static/thumbnails/e0d0e17f-84bb-4d51-b44f-b113b97c517f.jpg)
![[thumbnail]](/pictures/thumbs/danisrace_fail.png)
![[thumbnail]](/pictures/thumbs/depsgraph.png)
![[thumbnail]](https://peer.madiator.cloud/lazy-static/thumbnails/38a01a44-7857-4664-80bd-f076dd4e6142.jpg)
![[thumbnail]](https://peer.madiator.cloud/lazy-static/thumbnails/playlist-a1b6d474-c3d6-4516-b1be-1c9b95615d29.jpg)
![[thumbnail]](/pictures/thumbs/c.png)
![[thumbnail]](/pictures/thumbs/fork.png)
![[thumbnail]](https://peer.madiator.cloud/lazy-static/thumbnails/c07756b1-ce79-4c8a-ab26-056704c77915.jpg)
![[thumbnail]](/pictures/thumbs/upbge_ai.png)
![[thumbnail]](/pictures/thumbs/night_light_hard.png)
![[thumbnail]](https://peer.madiator.cloud/lazy-static/thumbnails/663d6dec-4e70-4e78-b513-a8f29526964e.jpg)
![[thumbnail]](/pictures/thumbs/activity_pub.png)
![[thumbnail]](/pictures/danisrace/2026-06-15/banner.jpg)
![[thumbnail]](/pictures/thumbs/get_access_fedi.jpg)
![[thumbnail]](/pictures/thumbs/dr_2025-01-14.jpg)

